
If you work in air conditioning, you know how important it is to monitor pressures. That’s where the pressure gauge comes in, a truly indispensable tool. It helps you understand what’s happening in your system, whether you’re charging a new fluid or simply checking that everything is working as it should. We’re going to look together at how this device works and how you can use it best.
Key takeaways
- The pressure gauge, often called a manifold, is the refrigeration technician’s main tool for reading pressures in an air conditioning system. It measures relative pressures, i.e., relative to atmospheric pressure.
- A standard set typically includes two pressure gauges: one for low pressure (LP), often blue, and one for high pressure (HP), often red. Each gauge has pressure scales (in bar or psi) and sometimes temperature scales for refrigerants.
- Mechanical pressure gauges use a Bourdon tube that deforms under pressure, while electronic versions offer greater precision and additional functions such as data logging.
- Before any use, ensure the pressure gauge is reset to zero and the circuit is purged of air (vacuuming). Connection is made to the system’s service valves.
- Interpreting the pressure gauge readings, in conjunction with the refrigerant temperature, helps diagnose the proper functioning of evaporation and condensation, and identify potential problems.
Understanding the role of the pressure gauge in air conditioning
The pressure gauge, often called a manifold, is truly the tool that defines the work of a refrigeration technician. Think of it as a doctor’s stethoscope, but for air conditioning systems. It allows you to understand what’s happening inside a refrigeration circuit and make the necessary adjustments. Without it, you’re navigating blind.
The pressure gauge, an essential tool for the refrigeration technician
This instrument is indispensable for any work on an air conditioning or refrigeration system. It serves several important purposes:
- Reading pressures, both on the high pressure (HP) and low pressure (LP) sides, while the system is operating.
- Performing charges or top-ups of refrigerant.
- Evacuating installations, a critical step before commissioning.
- Pressurising with nitrogen to check the circuit’s tightness.
- Controlling subcooling at the condenser and superheating at the evaporator.
The pressure gauge gives you a direct insight into the health of your refrigeration installation. It is through its indications that you can diagnose a problem and act accordingly.
Measurement of relative and absolute pressure
It’s important to know that the pressure gauge used by professionals measures relative pressure. This means the measurement is taken relative to the ambient atmospheric pressure. The zero on your pressure gauge dial therefore corresponds to the air pressure around you. Absolute pressure, on the other hand, is the sum of relative pressure and atmospheric pressure. For most air conditioning interventions, it’s the relative pressure that interests us.
General operation of the manifold
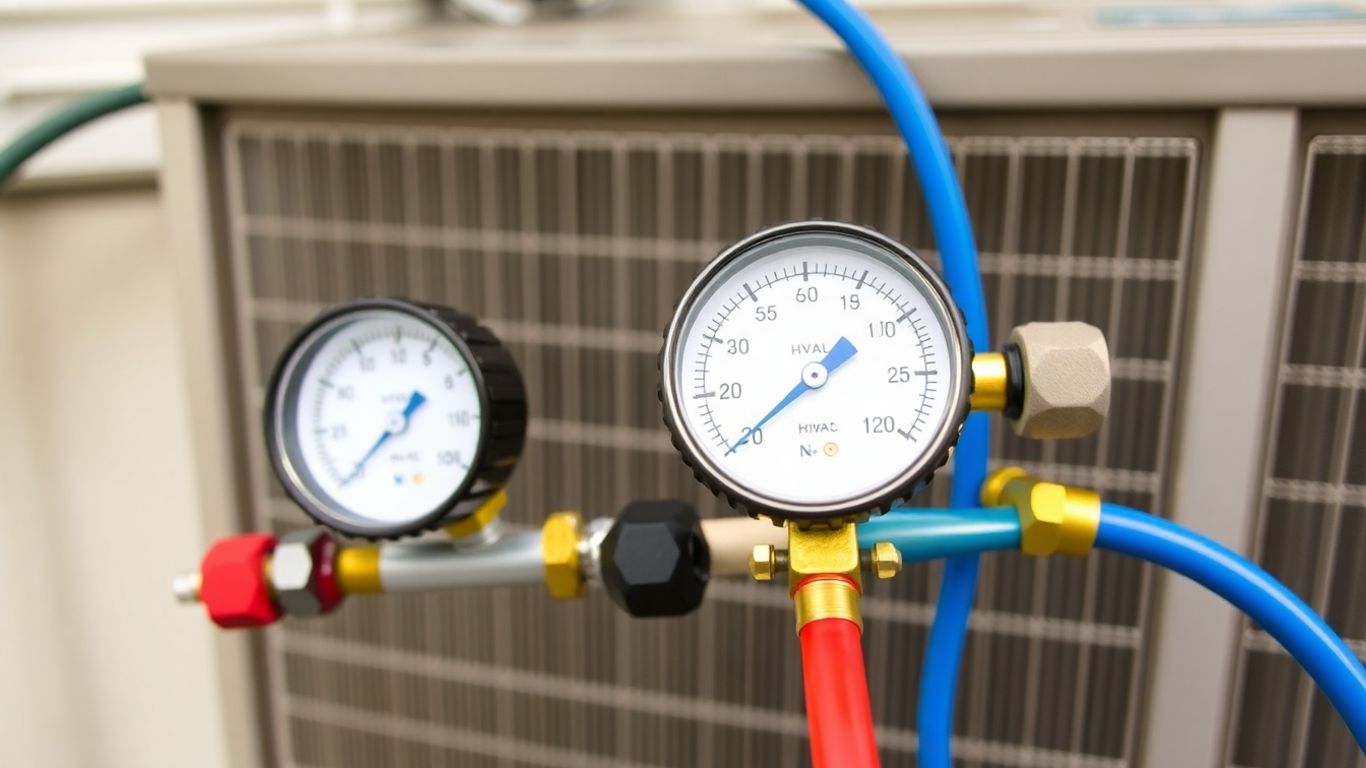
A typical manifold consists of a central body, often made of brass or aluminium, which serves as a connection point. Two pressure gauges are usually attached: one for low pressure (LP), often marked in blue, and one for high pressure (HP), marked in red. Connectors, called service ports, allow hoses to be connected. Valves, usually quarter-turn, control the flow of fluid between different parts of the system and the pressure gauges. An sight glass is also often found to observe the fluid and a hook to hang the tool.
| Component | Function |
|---|---|
| LP Pressure Gauge | Measures the low pressure of the circuit (suction side) |
| HP Pressure Gauge | Measures the high pressure of the circuit (discharge side) |
| Service Valves | Control fluid flow to the pressure gauges or system |
| Service Ports | Connection points for hoses |
| Sight Glass | Allows visualisation of the refrigerant state (liquid or gas) |
Analysis of pressure gauge construction
To properly understand how an air conditioning system works, you first need to know what the technician’s main tool looks like: the pressure gauge, also called a manifold. It’s a bit like a car’s dashboard, but for the refrigeration circuit. It gives you all the necessary information to diagnose a problem or perform a recharge.
Identification of HP and LP pressure gauges
A typical set of pressure gauges actually consists of two distinct instruments: one pressure gauge for high pressure (HP) and one for low pressure (LP). They are easily recognised by their colour: the LP pressure gauge is generally blue, while the HP pressure gauge is red. This colour distinction is also found on the hoses connected to them. Each pressure gauge has its own reading scale, often graduated in bar or psi. But that’s not all: you will also find temperature scales. These are particularly useful because they indicate the saturation temperature of the refrigerant at a given pressure. This is key information for knowing if your system is working correctly. Some older pressure gauges may even have specific scales for fluids like R12 or R22, although these are less common today.
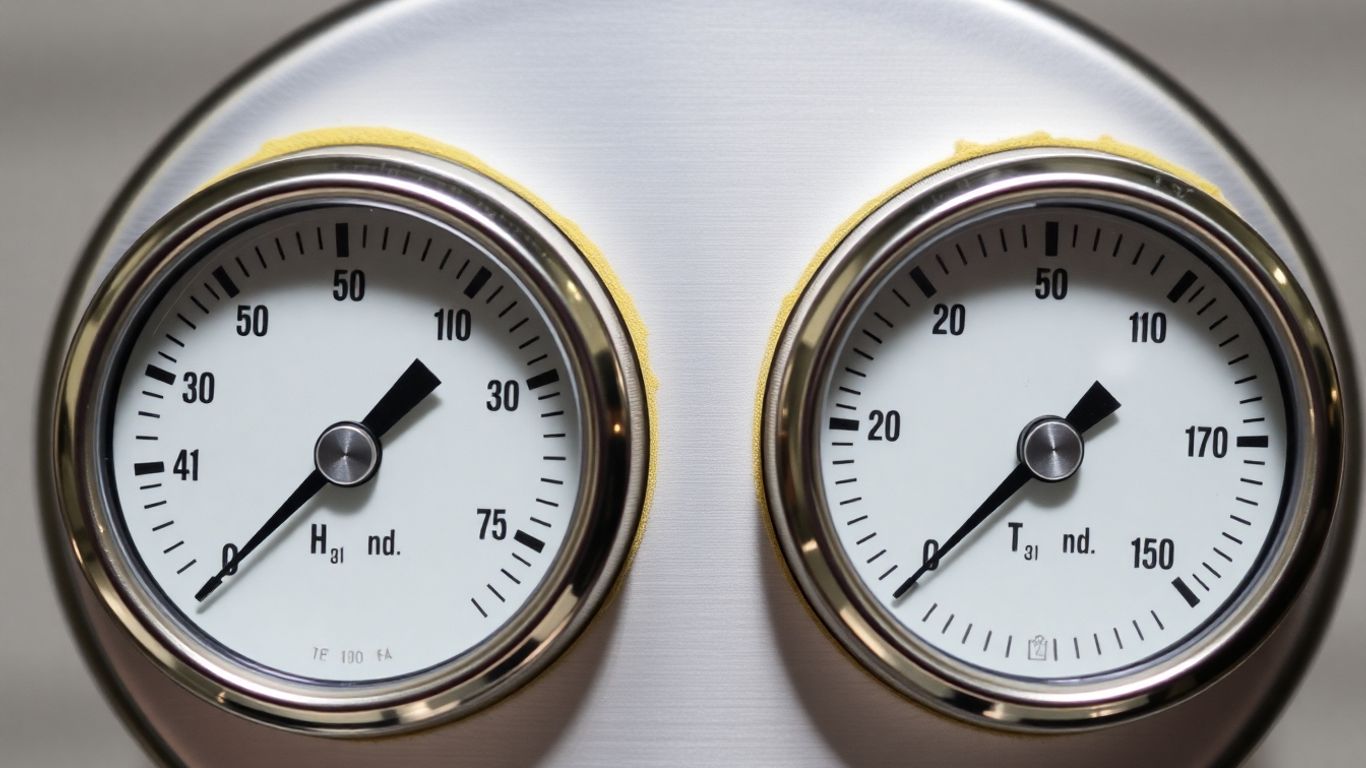
Reading pressure and temperature scales
Reading a pressure gauge can seem complex at first. So you have the main scale which indicates the pressure, usually in bar or psi. But the most interesting are the secondary scales which show the saturation temperature of the refrigerant. These scales are specific to each type of fluid. For example, for R410A, the saturation temperature at 10 bar will not be the same as for R134a. It is therefore essential to ensure that your pressure gauge is configured for the fluid you are using. Knowing how to read these scales allows you to check if the fluid is indeed in the liquid or gaseous state in the right places in the circuit, and if the evaporation and condensation temperatures are within limits.
Different types of fittings and valves
The central body of the manifold, often made of brass or aluminium, is the connection point for the entire system. You will find several
Exploring pressure gauge technologies
The world of pressure gauges for air conditioning has evolved considerably. Previously, everything relied on proven mechanisms, but today, digital technologies are taking centre stage. Understanding these different approaches will help you choose the most suitable tool for your needs.
The mechanical Bourdon tube pressure gauge
This is a proven technology, invented by Eugène Bourdon in 1884. The principle is quite simple: a curved metal tube, of small diameter, is subjected to the pressure you wish to measure. When the pressure rises or falls, this tube deforms, expanding or contracting. These small variations in shape are transmitted to a needle via a system of linkages, and this needle indicates the pressure on a graduated dial. It is a robust system, but it can be sensitive to vibrations.
Oil-filled manifolds to dampen vibrations
To counteract the effects of vibrations, particularly those produced by compressors, some pressure gauges are filled with a liquid, often glycerine or silicone. This filling dampens the needle’s movements, making readings more stable and extending the instrument’s lifespan. The scales indicate relative pressure, generally in bar or psi, and temperatures corresponding to the saturation state of the refrigerant used. It is important to know that all mechanical manifolds have a zero adjustment screw. Simply bring the instrument into contact with atmospheric pressure, by opening the valves, to adjust the needle to zero. Some models also incorporate a safety zone to prevent accidental overpressures.
Advances in electronic pressure gauges
Electronic pressure gauges have become essential tools for today’s technicians. They offer high precision, are easy to use, and integrate many useful functions. A major advantage is their compatibility with all refrigerants on the market, as data relating to these fluids is stored in the device. The technology relies on piezoelectric sensors and strain gauges. Pressure modifies the electrical resistance of the sensor, and this variation is then converted into a pressure measurement (bar or psi). These devices can record data, allow refrigerant updates, and even connect to temperature probes for real-time superheat and subcooling measurements. They are also very reliable for vacuum measurement and can perform precise leak checks by taking temperature into account. For heat pumps, they offer a secure operating mode that protects the instrument during cycle changes, switching from cooling to heating mode without issue. These digital instruments greatly facilitate work on air conditioning and refrigeration installations.
The evolution towards electronic pressure gauges marks a turning point in the precision and efficiency of air conditioning diagnostics. Their ability to manage various fluids and provide detailed data greatly simplifies interventions.
Practical use of the pressure gauge on an installation
Before embarking on any intervention on an air conditioning system, it is essential to properly prepare your equipment. This begins with resetting your pressure gauges to zero, whether they are high pressure (HP) or low pressure (LP). Ensure that the needles indicate zero when the manifold valves are all closed and the system is not under pressure. Next, you must perform a vacuum pull. This step involves removing air and moisture from the circuit using a vacuum pump. A properly evacuated system is essential for the proper functioning and longevity of the installation. Good preparation is the key to a successful intervention.
Connection to service valves
Connecting the manifold to the system’s service valves is a delicate step that requires precision. Refrigeration installations generally have two service valves: one low pressure (LP) and one high pressure (HP). The connection hoses, often colour-coded (blue for LP, red for HP) and by diameter, must be connected to the corresponding ports on the manifold, then to the unit’s service valves. It is important to ensure that the fittings are tightly secured to prevent any leaks. The central hose of the manifold, usually yellow, is intended to be connected to the vacuum pump or a refrigerant cylinder. You must correctly identify the charging ports on your equipment.
Common operations: charging, pressurising, checking
Once the manifold is correctly connected, you can perform various operations. For a refrigerant charge, you will sequentially open the appropriate valves, carefully monitoring the HP and LP pressure gauge readings as well as the temperature scales associated with the fluid used. It is also possible to pressurise the installation with an inert gas, such as nitrogen, to check the circuit’s tightness. In this case, you will open the valve corresponding to the nitrogen cylinder and monitor the pressure rise on the HP pressure gauge. Pressure readings, combined with temperatures, will give you valuable indications on the system’s operating status, such as evaporator superheat or condenser subcooling. It is also possible to check the proper functioning of the expansion valve or the low-pressure switch.
Here is an overview of common manipulations:
- Refrigerant charge: Open the LP and/or HP valve according to the procedure and fluid, monitoring the pressure gauges.
- Pressurisation (nitrogen): Open the nitrogen valve, check the pressure on the HP pressure gauge, then perform a vacuum pull after leak detection.
- Operational check: Read HP and LP pressures during normal operation to diagnose potential problems.
Interpreting the measurements is as important as the connection itself. An excessively high LP pressure can indicate an evaporation problem, while an excessively low HP pressure can signal an issue with the condenser.
Interpreting measurements provided by the pressure gauge
Once you have correctly connected your manifold, the next step is to understand what the needles and scales are telling you. This is where the real diagnosis begins. The HP (High Pressure) and LP (Low Pressure) pressure gauges are not there for decoration; they give you vital information about your air conditioning system’s behaviour.
Relationship between pressure and temperature of refrigerants
It is absolutely essential to understand that for each refrigerant, there is a direct and fixed relationship between its pressure and its temperature when it is in a saturated state. This means that if you know the pressure, you can determine the temperature, and vice versa. The dials of your pressure gauges often incorporate specific temperature scales for the most common refrigerants. For example, on an installation operating with R-410A, a pressure of 5 bar on the LP pressure gauge will correspond to an evaporation temperature of approximately 0°C. This correlation is key to assessing whether your system is operating under the correct conditions.
Identification of evaporation and condensation pressures
The LP pressure gauge informs you about the evaporation pressure. This is the pressure at which the refrigerant boils and absorbs heat in the indoor unit (the evaporator). An excessively low LP pressure can indicate a lack of fluid or an evaporation problem. The HP pressure gauge, on the other hand, indicates the condensation pressure. This is the pressure at which the refrigerant changes from a gaseous to a liquid state in the outdoor unit (the condenser) by rejecting heat. An excessively high HP pressure can signal a condensation problem, such as a fouled condenser or lack of ventilation. Knowing how to read and interpret these two pressures allows you to quickly diagnose whether the fluid is circulating correctly and if heat exchanges are occurring as expected. For even more precise measurements, the use of external temperature probes can be very useful.
Using fluid-specific scales
Modern manifolds are often equipped with several scales on each pressure gauge, each corresponding to a different refrigerant (e.g., R-22, R-410A, R-134a). It is imperative to select the correct scale corresponding to the fluid used in the installation you are servicing. Using the wrong scale will lead to completely erroneous pressure and temperature readings, resulting in incorrect diagnoses and potentially damage to the system. Make sure you correctly identify the refrigerant before connecting your instruments. If you are working with less common fluids or want maximum flexibility, electronic pressure gauges are an excellent option, as they can often be programmed for different fluids or have integrated databases.
Electronic pressure gauges and their advanced features
Precision and ease of use of digital instruments
Electronic pressure gauges represent a significant evolution compared to their mechanical counterparts. They use pressure sensors, often piezoelectric, coupled with strain gauges. These technologies allow for direct and very precise pressure readings, eliminating approximations related to needles and dials. The digital display makes data interpretation much simpler and faster. Furthermore, these devices are generally designed to be compatible with a wide range of refrigerants, with data for different fluids often pre-recorded in the instrument, which greatly simplifies interventions on various systems.
Data logging and report generation functions
One of the great strengths of electronic pressure gauges lies in their ability to record measurement data. This allows you to track the evolution of pressures and temperatures over a given period, which is particularly useful for diagnosing intermittent problems or verifying the stability of an installation after an intervention. Some models go further by allowing the generation of detailed reports, which you can then print or export. These reports document the operating conditions of the installation at a specific time, which can be very practical for preventive maintenance or for justifying your interventions to your clients.
Connectivity with temperature probes for in-depth analysis
To go even further in analysing the performance of an air conditioning system, many modern electronic pressure gauges offer the possibility of connecting to external temperature probes. By combining pressure measurements with precise temperature measurements, you can calculate superheat and subcooling in real-time. These two parameters are absolutely key to evaluating the efficiency of the evaporator and condenser, and therefore the overall performance of the refrigeration circuit. The ability to perform these calculations directly on site, without having to resort to separate tables or calculators, represents a considerable saving of time and an improvement in accuracy for your work.
Here’s an overview of the features you might find:
- Updating refrigerant databases.
- Reliable vacuum measurement with precise indication.
- Leak detection by temperature compensation.
- Heat pump mode for secure reading during cycle changes.
The adoption of electronic pressure gauges transforms the way you approach the diagnosis and maintenance of air conditioning systems, bringing precision, efficiency, and comprehensive documentation of your interventions.
Conclusion: Mastering pressure with your pressure gauge
There you have it, you now have a better idea of what a pressure gauge is and how it helps you in your work as a refrigeration technician. Whether you use a classic mechanical model or a more modern electronic version, the important thing is to understand how to read HP and LP pressures. These measurements are key to diagnosing problems, performing correct fluid charges, and ensuring the system is working well. Take the time to familiarise yourself with your tool, regularly check its good condition, and you will see that working on air conditioning systems will become simpler and safer. It’s an indispensable tool, so make sure you use it well.
Frequently Asked Questions
Why is it important to use a pressure gauge correctly in air conditioning?
Using a pressure gauge correctly is like having a superpower to understand what’s happening in an air conditioning system. It helps you know if everything is working well, such as the temperature of the air coming out or the pressure of the refrigerant gas. If you don’t use it properly, you could cause problems for the system or even injure yourself.
What is the difference between HP and LP pressure?
Imagine the air conditioning system as a road with two directions. LP (Low Pressure) is like the side where the gas expands to cool. HP (High Pressure) is the side where the gas is compressed and gets hot. The pressure gauge has two parts to measure these two different pressures.
How do I know if my pressure gauge is properly set before starting?
Before you start, you should always check that your pressure gauge is ready. It’s a bit like checking that your bike tyres are properly inflated. You need to reset it to zero, which means it reads ‘nothing’ when there’s no pressure. Then, you need to remove any air that might be inside, which is called ‘vacuuming’.
Are electronic pressure gauges easier to use than older ones?
Yes, electronic pressure gauges are often simpler. They clearly display the numbers on a screen, like a calculator. They can also store a lot of information about different refrigerants, which helps avoid confusion. It’s a bit like upgrading from an old button phone to a smartphone.
Why do some pressure gauges have different colours, like blue and red?
These colours are a kind of secret code for technicians. Blue is generally for low pressure (LP) and red for high pressure (HP). This helps to avoid mistakes when connecting the hoses to the air conditioning system. The hoses often have the same colours.
What do the numbers and needles on the pressure gauge dial mean?
The pressure gauge dial is a bit like a map. The needles show the current pressure, and the numbers around indicate how strong it is. There are often special scales that also show the temperature of the refrigerant gas. By looking at these indications, the technician knows if the system is working as it should.